BlueStacks is an emulator that emulates the android on Windows devices. You can download BlueStacks for free. However, the free version of BlueStacks comes with some limitations. Therefore, you need to root BlueStacks if you want to enjoy the features of the premium BlueStacks. BlueStacks is one of the most popular Android emulator with which you can run Android apps on your Windows computer.
If you root BlueStacks, then you will be able to disable promo ads icon on BlueStacks, get premium BlueStacks, remove banners, and perform more tweaks on BlueStacks. This will add more functionalities to your BlueStacks experience.
To root BlueStacks, we will use an application or tool called the BlueStacks Tweaker. With this tool, you will be able to root BlueStacks.
If you do not have BlueStacks on your computer, then download BlueStacks.
After that, you need to download BlueStacks Tweaker. After download, extract BlueStacks Tweaker on your computer.
How to root BlueStacks using BlueStacks Tweaker?
Steps to root BlueStacks using BlueStacks Tweaker
Step 1: After extraction, open BlueStacks Tweaker as an Administrator.
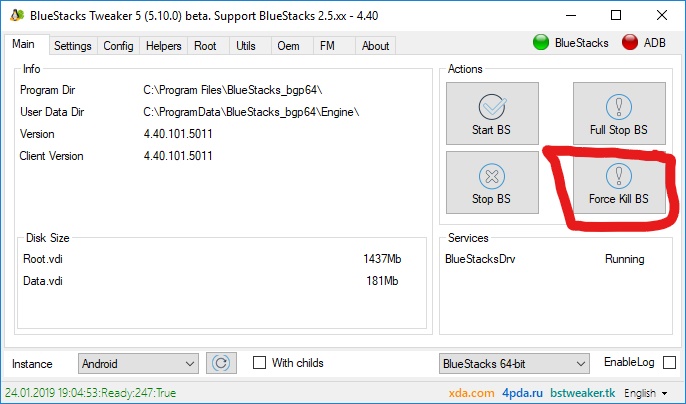
Step 2: Go to the Main tab and Force Kill BlueStacks by clicking on ‘Force Kill BS’.

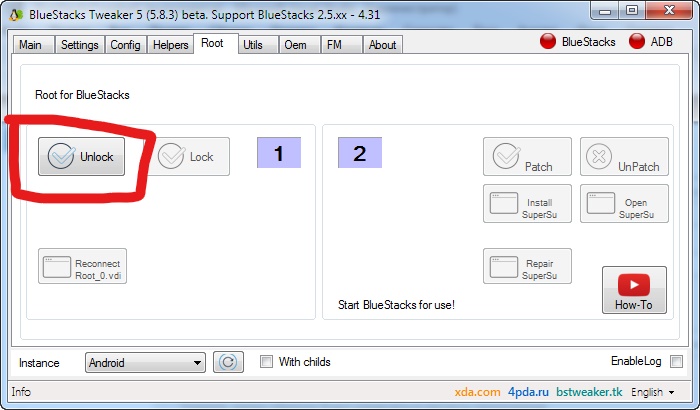
Step 3: Then, click on ‘Root’ tab, and then. click on ‘Unlock’.

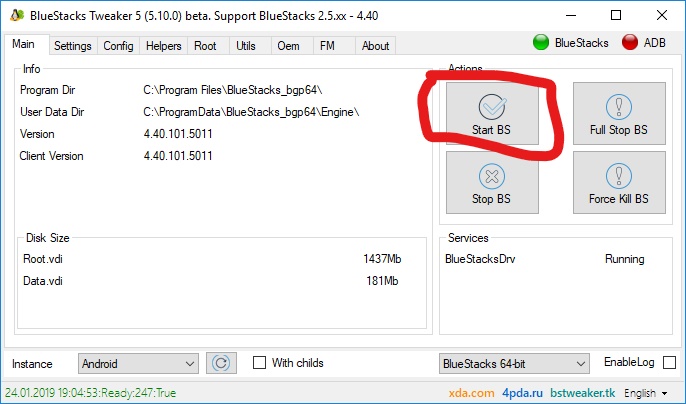
Step 4: After that, go back to ‘Main’ tab again, and click on ‘Start BS’ to open BlueStacks.

Step 5: Once BlueStacks is fully loaded, go to ‘Root’ tab and click on ‘Patch’. After the patch is complete, your BlueStack is completely rooted.

Related: How to uninstall stock apps from Android without rooting?
How to check if my BlueStacks is rooted or not?
To check if your BlueStacks has rooted or not, you need an android app called the root checker. Download the app from the Google Play Store and run the app to check it.
Follow ICTByte on Facebook for latest updates and tips: Facebook


